Last updated: July 15, 2026Release date: June 9, 2026GenesCreature crafter
Quick Answer
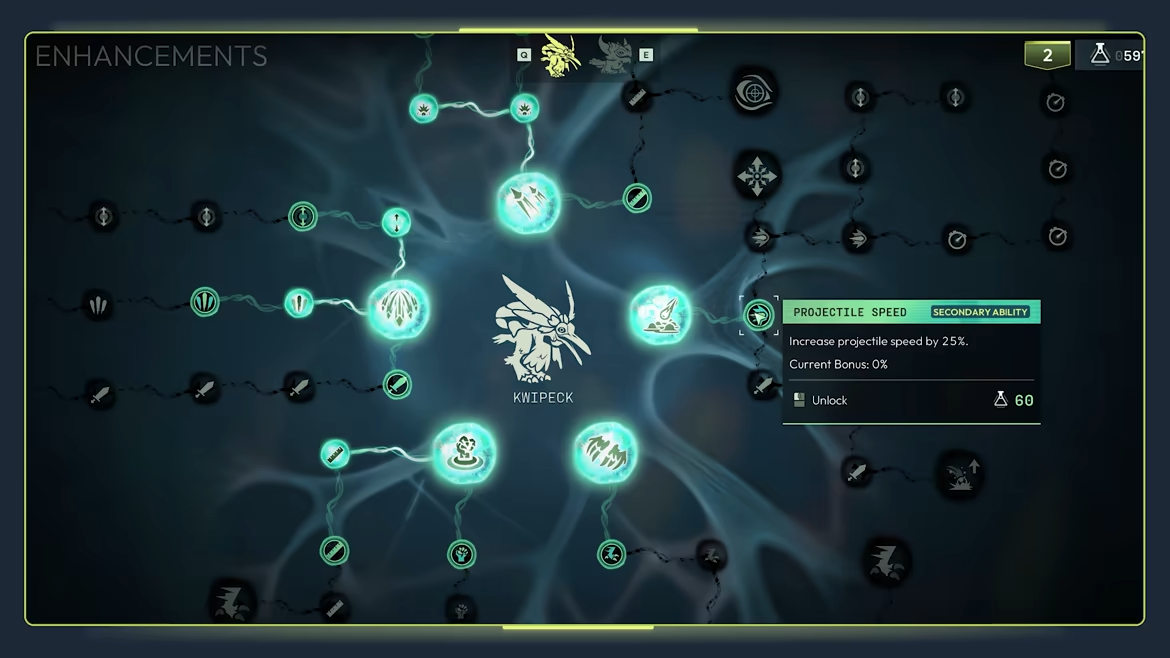
Use gene editing to make one role clearer, not to make every stat look acceptable. The safest gene changes in Voidling Bound are the ones that reinforce a creature that already knows its job: survive longer, move better, or finish fights more cleanly.
What this guide helps with
Gene editing is where a lot of players accidentally turn a good creature into a compromise. The menu is tempting because it suggests precision, but the build only improves if the genes support the same combat identity the Voidling already had. If the creature is supposed to be fast, do not bury that speed under side grades. If it is supposed to endure pressure, do not replace defense with novelty.
Think of genes like tuning a loadout after a rough mission. If the Voidling keeps getting clipped during reload windows, movement or survival support is probably worth more than a tiny-looking offense edit. If enemies survive long enough to crowd the screen, then damage identity matters. The good edit is the one that makes the next fight less awkward.
Treat gene edits like build tuning, not a shopping list. The useful edit is the one that makes your current Voidling hit cleaner, live longer, move better, or use its main ability more reliably.
Practical Gene Editing Notes
Do not edit genes just because the menu is available. The useful edit is the one that fixes the failed mission you can describe in one sentence: too fragile, too slow, too unfocused, or not enough damage at the right time. Make one edit, retest the route, and only stack more changes after the new weakness is visible.
Showcase Gene Edit Hold Rules
Final-evolution and boss-route videos can be useful, but they are bad gene-edit instructions by themselves. Before you copy a showcased idea, ask what the clip actually proves: a movement style, a damage window, a survival layer, or a final role. If you cannot name that job, hold the edit and run one mission with the current creature first.
Showcase makes you want to...Hold if...Make one edit if...Retest by watching...
Copy a final form immediately.Your current route does not share the same job yet.The current creature already plays the same role and only needs sharper support.Whether the next mission is easier to explain, not whether the menu looks closer to the showcase.
Edit for more damage.The showcased route wins by creating safe windows you cannot create yet.You already reach the same damage window and fights still last too long.Enemy pressure before and after the window, not just the biggest hit.
Edit for movement or defense.You are trying to copy a stylish route instead of fixing a repeated failure.The last mission failed because you could not stay safe long enough for the route to work.Whether the edit makes the same room calmer without killing the main attack plan.
Stack several gene changes at once.The showcase makes the whole build look solved, but you cannot name the first dependency.Never as a first response; make the smallest edit that tests the suspected dependency.One repeated failure. If it does not improve, stop and return to route priority.
A good showcase should give you a cleaner question, not a shopping list. If the edit does not make one named failure later, smaller, or easier to recover from, the showcased route may be real but wrong for this Voidling.
Gene Edit Table
Gene jobWhat to look forWhat to avoid
OffenseGenes that make the Voidling's chosen attack finish fights faster.Small damage gains that do not change how the build plays.
DefenseGenes that help the Voidling stay alive long enough for the plan to work.Defense that only helps after the run is already stable.
MovementGenes that make positioning and survival easier in mission combat.Static power that sounds strong but does not help the fight flow.
UtilityGenes that improve control, consistency, or mission comfort.Utility that only matters in edge cases the current route will not hit.
Flex / experimentOnly use when the Voidling already has a clear role and the new choice is truly helpful.Trying to make one creature do every job at once.
First Edit Decision Map
What the last mission showedGene directionWhy it helps
You lose before your main attack matters.Survival or movement first.The build needs enough time and space for the plan to show up.
You survive, but fights drag on.Offense that supports the chosen attack style.The Voidling already has stability; now it needs a cleaner finish.
You keep missing windows or getting boxed in.Movement, control, or ability uptime.The problem is fight rhythm, not raw power.
The creature feels playable but bland.One sharper role edit.A clear strength is better than a creature that is merely okay everywhere.
Route-to-Gene Support
After the Creature Route Matrix gives you a species and route, use gene editing to keep that route honest. This is where a Fire Kwipeck, poison Kerapin, melee Morfang, or skirmisher Anami either becomes cleaner or turns into a stat soup. The edit should support the route you already picked, not start a second build.
RouteGene support to preferBad edit habitPlayer read
Fire pressureOffense, ability uptime, and enough movement to keep pressure active.Adding defensive side edits because the route feels scary instead of learning when to leave.Fire wants tempo. If the creature is already surviving, make the burn-forward plan sharper. If it is dying before pressure matters, fix movement first, not random damage.
Poison or attritionSurvival, control, sustain, or consistency that buys time for damage-over-time pressure.Editing for burst damage and accidentally abandoning the whole attrition plan.Poison routes are patient, not passive. The useful gene is the one that lets the Voidling stay safe while pressure stacks, not the one that makes the stat panel look louder.
Melee bruiserRecovery, defense, close-range uptime, and movement tools that let the creature enter and exit cleanly.Pure offense edits that make one greedy dive look good and the next mission look dead.Melee is not just damage. A Morfang or Gilick that cannot survive contact is not a bruiser; it is a highlight clip waiting to fail.
Mobile skirmisherMovement, reload comfort, ability rhythm, and enough focused damage to finish after repositioning.Over-editing movement until the creature can dodge forever but cannot end a fight.Skirmisher routes need a punchline. If every gene says "more mobility," ask which attack actually wins after all that movement.
Summon / setup controlUtility, uptime, survival, and field control that make minions, turrets, or forms easier to manage.Treating setup creatures like simple damage picks.Gwigoon, Nimiod, and Ur-Sek can reward patience, but only if the genes help the setup stay readable when the screen gets crowded.
When Not to Edit
Skip the edit if you cannot say what problem it solves. That sounds strict, but it saves runs. A gene that makes the stat panel prettier can still make the creature harder to pilot if it pulls the build away from its main job. In a creature-crafter shooter, "more options" is not always more power; sometimes it just means one more thing to misunderstand while the fight is already loud.
The trap is editing because the menu is open. If the fight exposed movement, edit toward movement. If the fight exposed damage, edit toward damage. If the fight exposed nothing obvious, hold the resource until the next pressure spike gives you a real answer. Do not chase a clever gene line just because it sounds like future value.
What Usually Goes Wrong
A gene plan that feels busy usually means the Voidling is being asked to cover too many jobs. The recovery move is to name the one job that keeps failing, then edit only the layer that supports it. If your creature keeps collapsing under pressure, fix survival or movement before trying to look smarter on offense.
How to Edit Safely
Decide the Voidling's job before opening the gene menu.
Ask whether the edit makes the current role clearer.
If the edit only changes the creature without improving the route, skip it.
If two edits are possible, pick the one that fixes the current weakness.
After editing, test the next mission before chaining more changes.
Failure Checks
If this happensWhat it meansWhat to do
The genes look optimized but the build still feels weak.The edits did not match the role.Re-center on survival, damage, or movement.
The creature feels balanced but not dangerous.The build is diluted.Specialize the gene plan instead of smoothing everything out.
The Voidling becomes hard to read in combat.Too many side effects are stacked together.Strip the plan back to the most useful genes.
The next harder mission exposes the same problem again.The gene edits did not address the main weakness.Change the gene layer that matters most, not the layer that looks smartest.
Gene Edit Retest Loop
After a gene edit, do not judge the change from the menu. Judge it from one controlled mission where you watch the same failure that made you edit in the first place. A good edit should make that failure later, smaller, or easier to recover from. If the next mission fails in the same way, the gene may be interesting, but it did not solve the route problem.
Last repeated failureEdit direction to testSuccess should feel likeStop condition
Fights end too slowly even when you play cleanly.One offense or ability-uptime edit that supports the main attack.Enemies reach dangerous pressure less often before dying.Stop if the edit makes survival or movement worse.
The Voidling dies before its route matters.Survival, recovery, or movement comfort before damage greed.The same room gives you more time to aim, reset, or finish the plan.Stop if the creature survives but cannot end fights anymore.
You miss ability windows or lose rhythm under pressure.Utility, uptime, control, or a simpler play pattern.The route becomes easier to repeat without adding extra decisions.Stop if the edit adds noise you cannot track in combat.
The build looks stronger but still feels scattered.Undo the sidegrade mindset and reinforce one role only.You can explain the Voidling's job in one sentence again.Stop making edits until a new mission shows one clear weakness.
The rule is one edit, one mission, one repeated failure. If you change several genes and then change breeding or evolution at the same time, you have no clean read on what helped. That is how a creature with good-looking parts becomes harder to pilot than the old version.
Neutral Element Splicing: What Changed
The official July 2 patch confirms that creatures can now be spliced with a Neutral Element. That expands the legal combinations available to you; it does not prove that Neutral is universally stronger, that every combination is equally useful, or that a fresh splice should replace a stable creature.
Your situationSafe use of the new optionWhat success looks likeStop when
Your role has one obvious weakness that the current options cannot address cleanly.Test one Neutral splice as a focused answer to that weakness.The next mission makes the same job easier to execute.The creature becomes harder to explain or loses its existing strength.
A showcase makes the new combination look exciting.Keep the showcase as an idea, then compare it with the failure in your own route.You can name why this splice helps survival, movement, pressure, or finish.You are splicing only because the combination is newly available.
Your current creature already clears its next mission reliably.Hold the splice for a real wall instead of replacing a stable route.You preserve a working baseline for the next comparison.You no longer have a clean creature to compare against.
The official July 2 notes confirm availability only. Use the mission retest loop above before calling any Neutral combination a build upgrade.